
RFM12b module vs. Jeelink
This post follows on from this one where Gareth explains how to use an RFM12b module with an RPi. To recap, the RFM12b module is a radio transciever like the Jeelink, but it is much cheaper. It is, however, slightly harder to use. The Jeelink connects via USB and is immediately exposed as a serial port. But this RFM12b module is soldered directly onto the (in this case) Raspberry Pi. It requires installing the rfm12b_linux kernel module, which creates a /dev/ entry. This is explained in the previous post.
rfm12b_linux and node-red
This section deals with using rfm12b_linux and node-red in particular. The rest of the post applies just as much to the Jeelink. Assuming you have a stream of data being received by the RFM12b module, the next question is how to make use of that data in node-red. (This example assumes node-red is running on the RPi itself). Given that the RFM12b module is exposed as a device, our first thought was to simply tail it like a file. But this did not seem to work, as was borne out by the nonsensical output of as using cat on the command line. But luckily, when you get the kernel module from github, it comes with some example code. One of the examples, rfm12b_read, is extremely useful. It interprets the data and relays it to standard out in the form of nice human readable strings.
Using the exec node, you can simply run the rfm12b_read script directly in node-red. You just need to tell the node the location of the script, and set it to spawn() rather than exec(). This latter step tells it to give you the data in chunks as it comes it, rather than all at once in a big pile!
Add an injector to the left of the exec node, set to start automatically, and that is all there is to reading the data into node-red.

Sorting and parsing data from multiple sensors
In the RFM12b protocol (used by Jeenode and Jeelink as well as the RFM12b module), you specify a group id and a node id for each device. In this case we have a number of different sensors all broadcasting data and a central base station (the RPi) that needs to listen to them all. In the sensor-side code (which I won’t go into here), we set the group id to the same for all the sensors, but gave each one a different node ID. That way the RPi can listen to all the sensors in the group, and also be able to tell them apart.
In this example the RPi is receiving data from a RoomNode and also from this pH sensor, fresh from the Layer Zero Labs inventory…

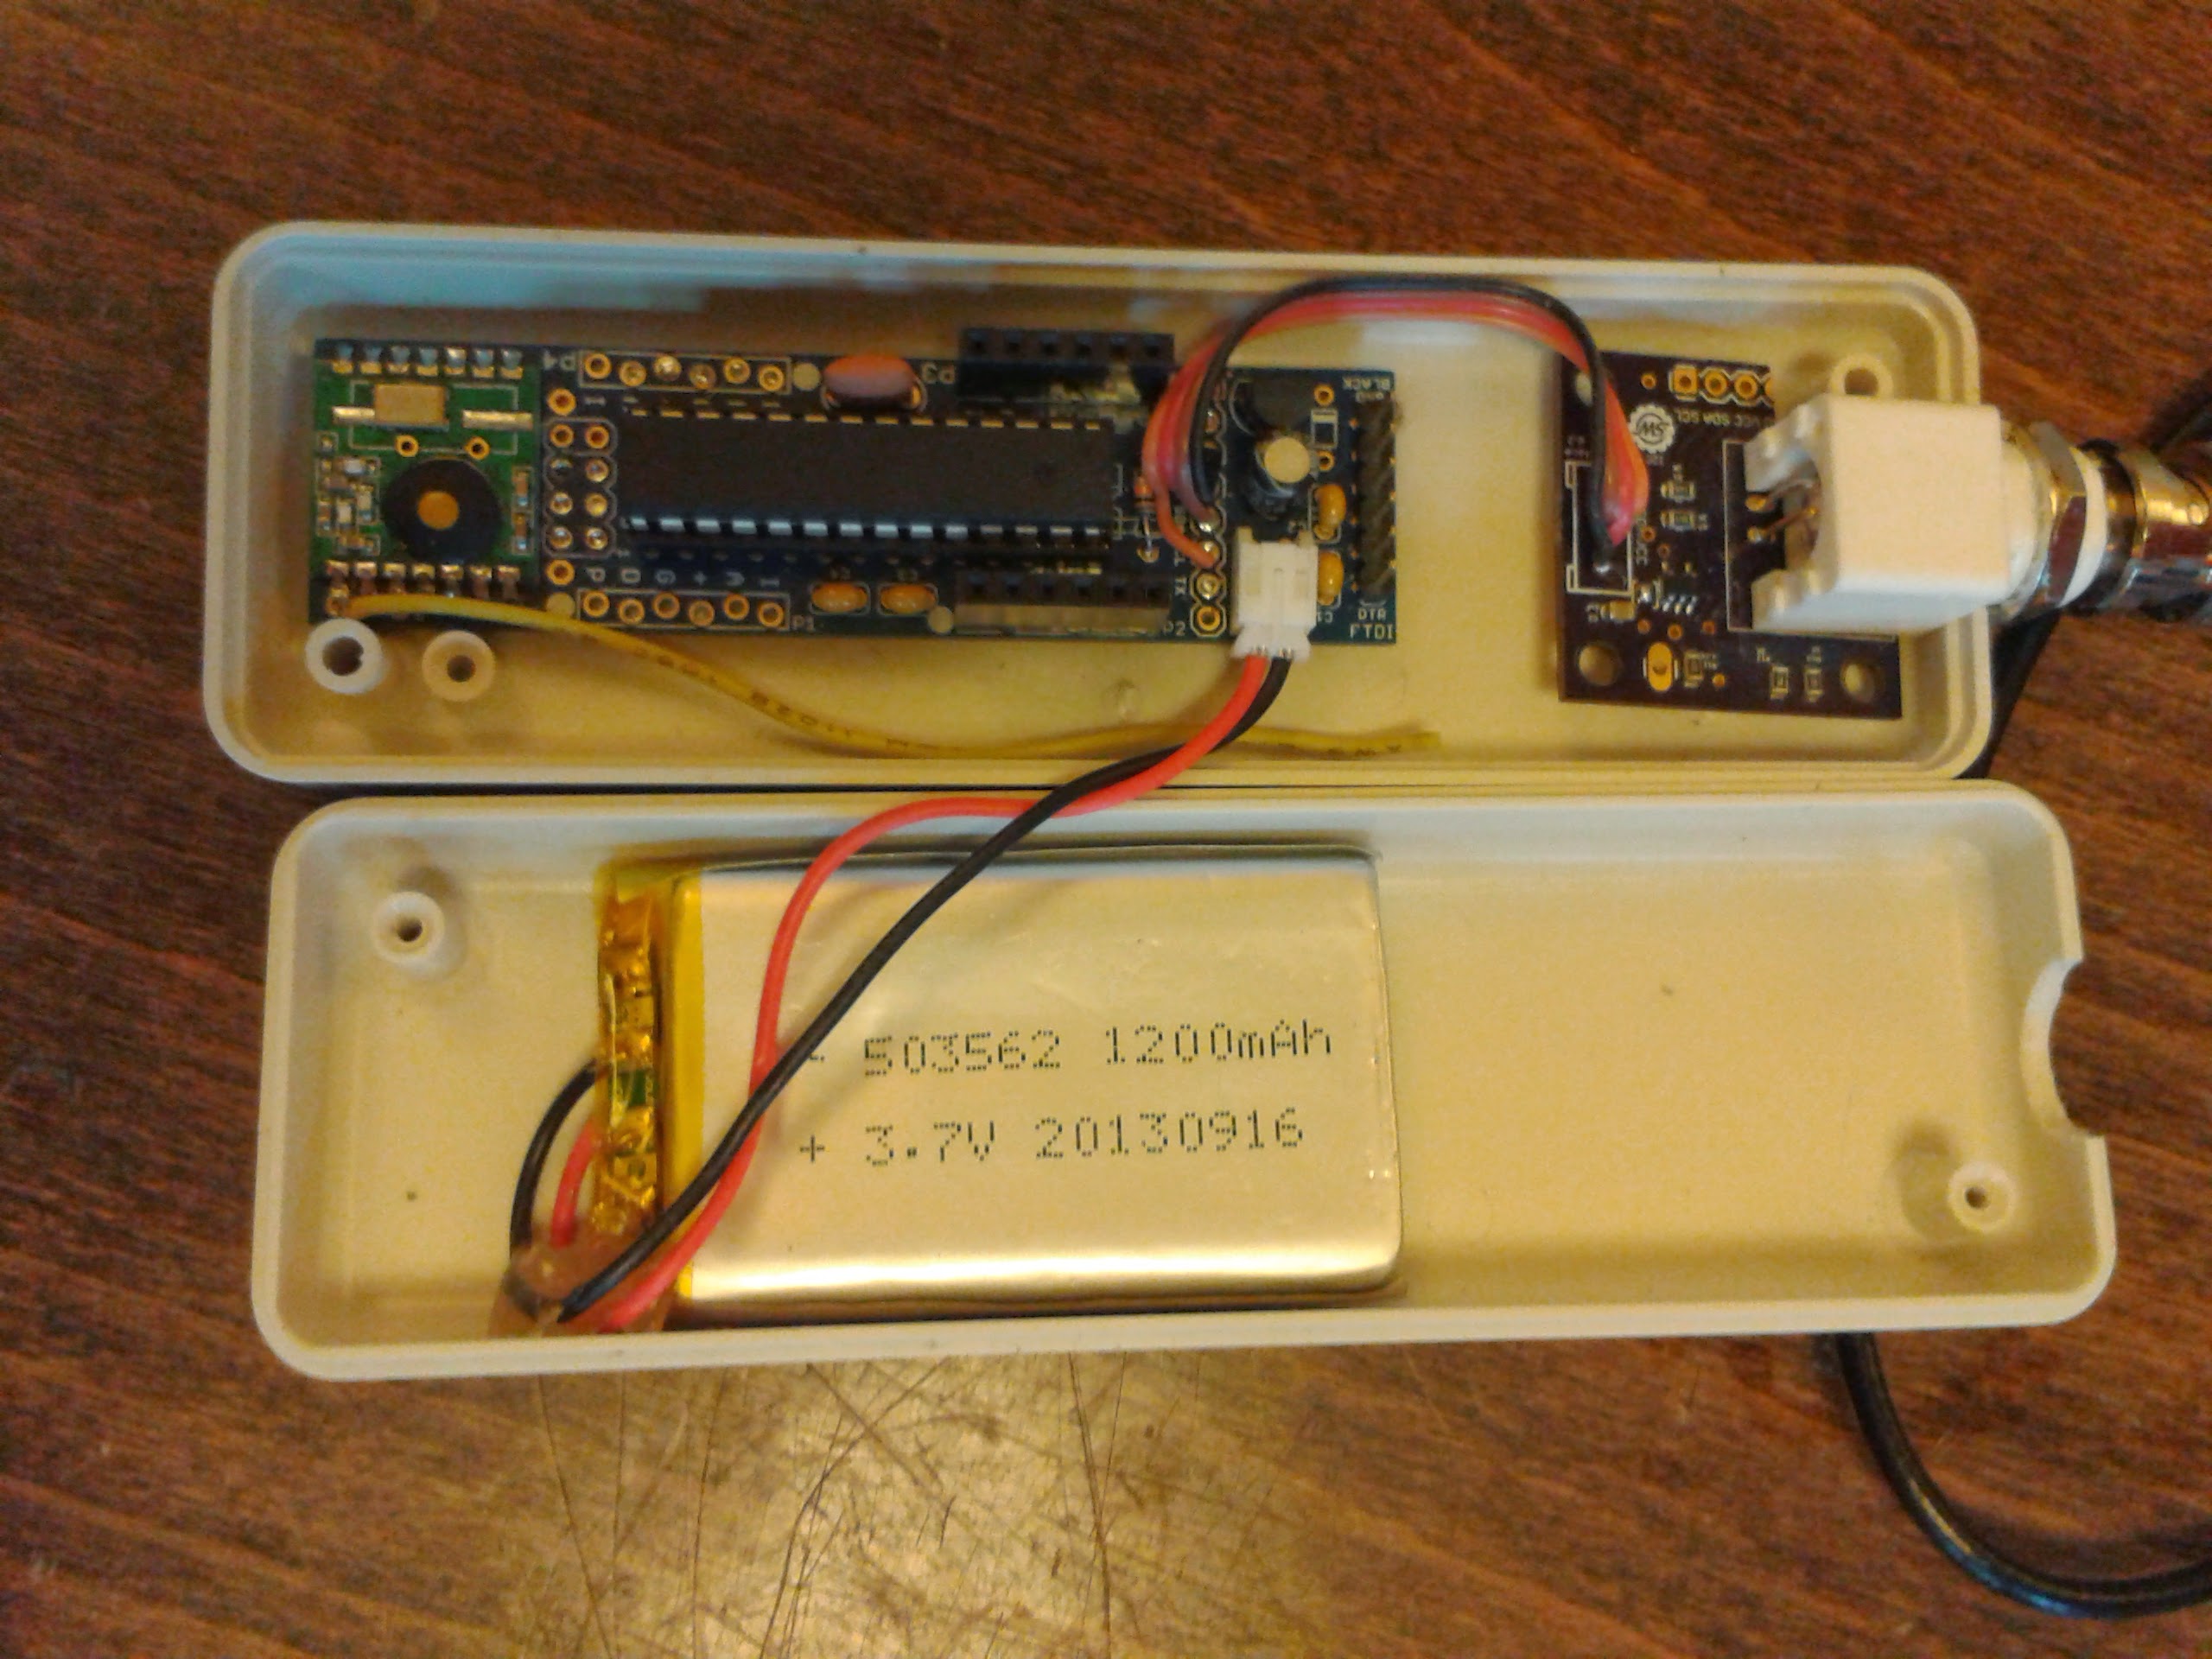
(I’m sure Gareth will be along with a post soon to describe the hardware.)
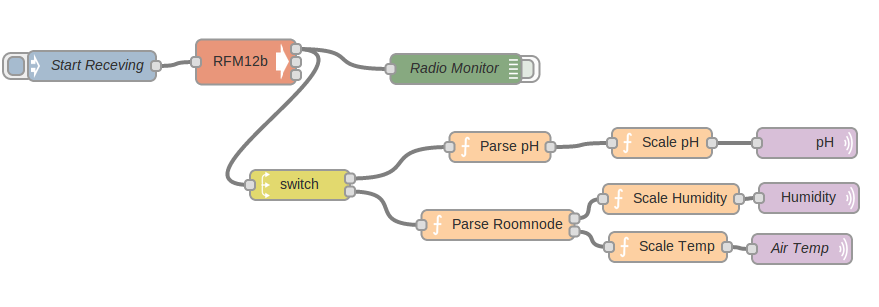
Back to node-red … basically it is just a case of using a switch node to decide which sensor the data is coming from, and then ordinary function nodes to extract meaningful values from it. However there are a few gotchas at this stage. Also the way we have done it is probably not the best, so go carefully!
The rfm12b_read script appends the date and some other information to the beginning of each set of data. It produces something like this:
Sat Mar 29 15:52:48 2014 6 bytes read 3 4 0 88 234 0
In this case 3 is the node id (meaning that it is the roomnode), 4 means that there are four bytes to follow, and the rest is the actual raw sensor data.
However this is not a string as such but a buffer object, which node-red signifies by appending “(Buffer)” so that the actual payload is:
(Buffer) Sat Mar 29 15:52:48 2014 6 bytes read 3 4 0 88 234 0
I confess to not having researched what a buffer object is, but it is stringy enough to pass it through a switch node like this:
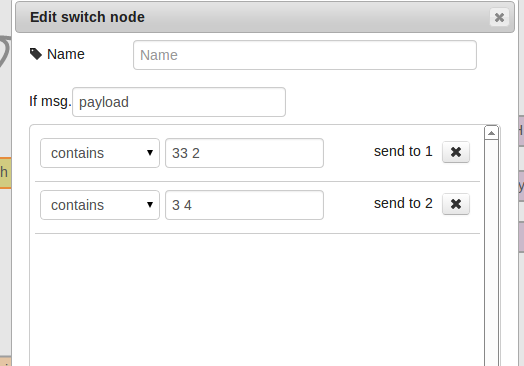 The switch node looks for the string “33 2”. i.e. node id 33 and 2 bytes to follow, or conversely “3 4”, node id 3 and 4 bytes to follow. This sorts out the data streams from different sensors, while doing a very cursory check that it is not malformed.
The first gotcha is that I tried to check for it containing “6 bytes read 3” or the like, so as to be more sure that it was not malformed, but this did not work, which is probably something to do with the buffer not being exactly a string.
Once the data is sorted into the correct streams, the next thing to do is to parse it. I chose to split the payload into an array, using space as the delimiter, and then use pop() to read each byte in turn. Here’s the second gotcha: the buffer object needs a toString() before it can be split(). The third gotcha is that it also has a newline on the end, so throw away the result of the first pop().
Also be aware that the data is in bytes, and of the byte order.
// function: Parse pH
var dataArray = msg.payload.toString().split(‘ ‘);
dataArray.pop(); // last element is newline
var pHMSB = dataArray.pop();
var pHLSB = dataArray.pop();
var pH = 256* parseFloat(pHMSB)+ parseFloat(pHLSB);var pHMsg = {payload: pH};
return [pHMsg];
The pH is a single sensor, but the roomnode includes data from various sensors, in our case temperature and humidity, so the code is a little more complex and the function has two outputs, one for each sensor:
// function: Parse Roomnode
var dataArray = msg.payload.toString().split(‘ ‘);
dataArray.pop(); // last element is newline
var tempMSB = dataArray.pop();
var tempLSB = dataArray.pop();
var humidity = dataArray.pop();
var temp = 256* parseFloat(tempMSB)+ parseFloat(tempLSB);var humidityMsg = {payload: humidity};
var tempMsg = {payload: temp};return [humidityMsg, tempMsg];
Because of the way we have the gain set, some of the data needs dividing by 10 or 100 after that, hence the scale functions.
Onward …
My next steps for this:
1. Get a better understanding of what the rfm12b_read script does, and why the data can’t be read directly from the /dev/ or if it can, then what I was doing wrong when I tried it.
3. Understand the buffer object and therefore maybe be able to use some of the metadata as a check against corruption. Otherwise, avoid reading in the date and time etc. just to then throw it away.
Very nice post!
Can you share you jeenode sketch?
Is you Jeelink running RF12Demo sketch?
Cheers
Naoufal